


How to Prepare Your Garage for a New Floor Coating
August 12, 2025 | By Quick Response Garage Floor Coatings
Upgrading your garage floor with epoxy, polyurea, or another durable coating is a smart investment for homeowners in Phoenix and surrounding areas.
A fresh floor coating not only enhances the look of your garage but also improves its functionality and long-term value. However, getting the best results starts well before the coating is applied—it begins with proper preparation.
Ready to get started on your garage upgrade? Contact us through our online form or call us at (602) 892-5165 today to schedule your project.
Step 1: Clear Out the Entire Garage
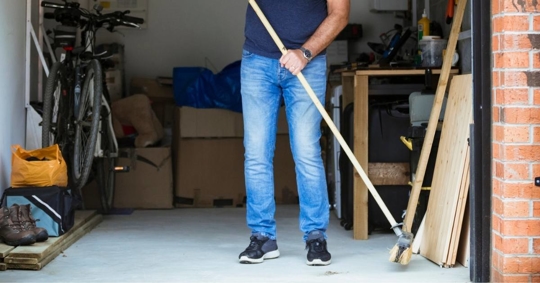
Before you can even begin to touch the concrete, you need to clear the entire space. This might seem like a simple task, but doing it methodically will save you a lot of time and effort. Remove everything from your garage—cars, tools, boxes, shelves, appliances, and anything else resting on the floor. This is a great opportunity to declutter and organize, so consider setting up temporary staging areas in your driveway or another space. Once the garage is completely empty, you’ll have a clear view of the floor and can start the next phase of the preparation process.
Step 2: Thoroughly Clean and Degrease the Concrete
A clean floor is a non-negotiable step. Over the years, your garage floor has likely accumulated stains from car fluids, chemicals, and general dirt. Simply sweeping and mopping won't be enough to remove these deeply embedded contaminants. The goal is to strip the floor down to a clean, porous state so the new coating can bond effectively.
1. Durable and Easy to Maintain
The best part about epoxy patio flooring is its strength and durability. Unlike concrete, if installed correctly, epoxy will last more than ten years, and you will not have to worry about replacing the flooring every few years. Concrete flooring is relatively porous, and things like juice, wine, or any dark material will leave behind stains if not cleaned immediately.
An epoxy outdoor patio adds a layer of protection and is impenetrable and seamless, making it easier to clean and maintain. You will not have to worry about cleaning after a party as all it will need is just a simple mop or sweep to wipe the surface clean.
Sweep Thoroughly: Start by sweeping the entire floor to remove loose debris, dirt, and dust. A shop vac can be very effective for getting into corners and cracks.
Remove Grease and Oil: Use a heavy-duty degreaser or a cleaner designed for concrete to scrub away oil and grease stains. You may need a stiff brush to work the cleaner deep into the concrete's pores.
Wash the Floor: After scrubbing, rinse the entire floor with a pressure washer or a strong hose. Be sure to remove all traces of the cleaner and degreaser. It's crucial that no residue is left behind, as this can affect the coating's adhesion.
Allow for Complete Drying: This is one of the most critical steps, especially in our desert climate. The concrete must be completely dry before a coating is applied. Depending on the weather and humidity, this can take a day or longer. You can use fans to speed up the process, but patience is key to avoiding moisture issues later.
Step 3: Repair Cracks and Other Imperfections
Even with a clean surface, your floor may have cracks, chips, or other damage that needs to be addressed. Repairing these flaws is essential for a smooth and flawless final appearance. Skipping this step can lead to a coating that looks uneven or, worse, cracks along with the concrete underneath it.
Small cracks can be filled with a concrete repair product or a professional-grade filler. For larger cracks or deep divots, a two-part epoxy repair compound is often the most durable solution. The goal is to create a level surface that matches the surrounding concrete. Once the filler is applied and has cured, it can be sanded down to create a seamless finish.
For floors with significant unevenness or a rough texture, grinding the concrete is often the best solution. Concrete grinding uses a specialized machine to sand down the top layer of concrete, creating a perfectly smooth and flat surface. This process also helps to open up the concrete's pores, further improving the coating's ability to bond. If your floor has heavy damage or an existing coating that needs to be removed, grinding is a necessary step.
Step 4: Test for Moisture to Prevent Future Issues
Moisture is a significant enemy of floor coatings. If there is too much moisture in your concrete slab, it can create a vapor pressure that will eventually cause the coating to delaminate or peel. While our arid climate in Phoenix helps, moisture can still be a concern from groundwater or plumbing issues. A professional will use specialized tools to check for moisture content. This step is a crucial part of our process and provides peace of mind that your new floor will last.
Step 5: Prepare the Surface for Optimal Adhesion
After cleaning and repairing, the final step in preparing the concrete is to ensure it is porous enough for the coating to bond. This is typically done through a process called "etching," which can involve a mild acid solution or mechanical grinding.
Many modern, high-performance coatings, such as those used by Quick Response Garage Floor Coatings, require mechanical grinding rather than acid etching.
This method is more effective at opening up the concrete’s pores and creating the perfect profile for strong adhesion. Once the surface is properly profiled, a primer is sometimes applied to further enhance the bond between the concrete and the new coating, creating a strong, lasting foundation. To explore the many options for your new garage floor, visit our garage flooring page to see the quality you can expect.
Ready to Start Your Garage Flooring Project?
Don't let the preparation process overwhelm you. Our team at Quick Response Garage Floor Coatings serves homeowners in Phoenix, Mesa, Scottsdale, and the surrounding areas, and we handle every step of the process with expertise and care. From the initial cleaning to the final application, we ensure your garage floor is perfectly prepared for a beautiful, long-lasting finish.
Contact us today to schedule a free, no-obligation consultation and start your garage transformation. Call us directly at (602) 351-5543 to speak with a professional.

Follow Us


License #: 329275